

Photo: F&M Construction
A wooden door can be one of the most distinctive features of a home, adding warmth, character, and architectural appeal. Over time, however, everyday use, sunlight, moisture, and changing temperatures can leave the surface looking faded, scratched, or worn.
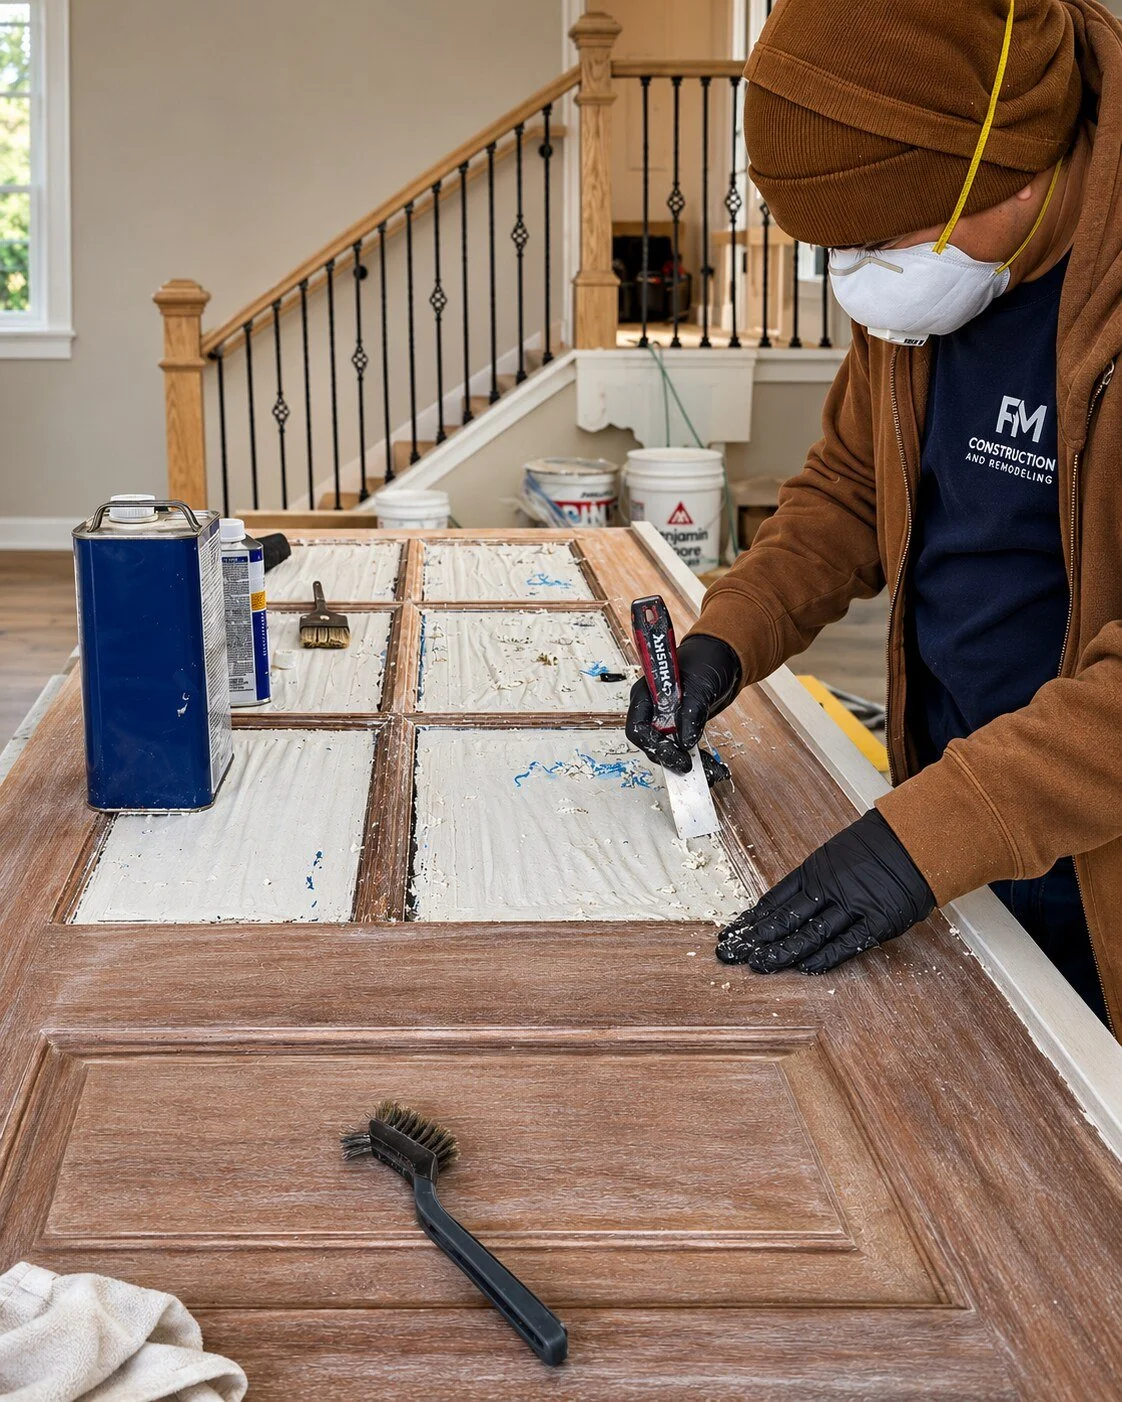
The good news? You can refinish a wooden door without removing it from its hinges. With the right preparation, tools, and finishing products, homeowners can restore much of their door’s original appearance while avoiding the inconvenience of taking it down.
For homeowners in Bellevue, Kirkland, Redmond, and surrounding Eastside communities, refinishing an existing wooden door can be a practical way to refresh an entryway or interior space without investing in a complete replacement.
Here’s how to do it properly.
Can You Refinish a Wooden Door While It’s Still Hanging?
Yes. Most wooden doors can be refinished while remaining attached to their hinges, provided the door is structurally sound and the existing coating can be safely removed or prepared.
This approach works particularly well for interior doors, lightly weathered entry doors, and doors that simply need a fresh protective coating.
However, there are limitations. Exterior doors with significant water damage, peeling finishes, or exposed wood along their bottom edges may require removal for a complete restoration. Protecting all six sides of an exterior wooden door, including its top and bottom edges, is important for reducing moisture intrusion.
Before beginning, inspect the surface for cracks, peeling varnish, deep scratches, discoloration, and signs of moisture damage.
Tools and Materials You’ll Need
A successful door refinishing project starts with proper preparation. Gather the following supplies:
180- and 220-grit sandpaper or sanding blocks
A clean microfiber cloth and tack cloth
Mild wood-safe cleaner
Painter’s tape and protective drop cloths
A high-quality paintbrush or foam applicator
Compatible wood stain, if changing the color
Clear protective finish suitable for the door’s location
Wood filler for minor imperfections
Protective gloves, eye protection, and appropriate respiratory protection
For exterior doors, choose a coating specifically formulated for outdoor exposure. Interior-only polyurethane should not be substituted for an exterior-rated finish.
Step 1: Clean the Door and Protect the Surrounding Area
Start by thoroughly cleaning the door to remove accumulated dust, grease, fingerprints, and residue.
Use a mild, wood-safe cleaning solution, then allow the surface to dry completely.
Place a drop cloth beneath the doorway and carefully apply painter’s tape around hinges, glass panels, locks, decorative hardware, and adjacent trim.
Secure the door with a doorstop so it remains stationary throughout the refinishing process.
If possible, remove the handle and lock hardware while leaving the door attached to its hinges. This makes it easier to achieve an even finish around these areas.
Step 2: Sand the Wooden Door
Sanding is one of the most important stages of wooden door restoration.
It helps smooth surface imperfections and prepares the wood or existing coating to accept a new finish.
If the current finish is intact and you only want to refresh it, use fine-grit sandpaper to lightly scuff the surface.
For doors with peeling varnish or extensive damage, a more thorough restoration may be necessary, potentially including chemical stripping before sanding.
Always sand in the direction of the wood grain. Use gentle pressure, particularly on veneered doors where aggressive sanding can permanently damage the surface.
After sanding, remove dust with a vacuum and suitable cloth before applying any finishing products.
The surface should be clean, dry, and free of contaminants that could interfere with the new coating.
Important: If your home was built before 1978 and the door has an existing painted coating, check for lead hazards before disturbing the surface. Follow applicable EPA lead-safe renovation requirements.
Step 3: Repair Minor Scratches and Surface Damage
Once the door has been sanded, examine it for small dents, holes, and cracks.
Minor imperfections can often be repaired using a stainable wood filler compatible with the intended finish.
Apply the filler according to the manufacturer’s instructions, allow it to cure, and sand the repaired section until it is level with the surrounding surface.
For doors that will receive a transparent stain, be aware that wood filler may absorb color differently from natural wood. Test the repaired area before applying stain across the entire door.
Deep cracks, soft wood, or extensive moisture damage may indicate problems that require more than cosmetic refinishing.
Step 4: Apply Wood Stain for a Fresh Appearance
If you want to change the color of your wooden door, staining can create a noticeably different appearance while preserving the natural wood grain.
Popular wood finishes for contemporary homes include warm walnut, natural oak, rich mahogany, and darker brown tones.
For a consistent stain color, the old finish generally needs to be removed sufficiently to expose absorbent wood.
Apply the stain in small sections, following the direction of the grain. Remove excess stain within the time specified by the manufacturer to avoid blotches and uneven coloring.
Gel stains can be particularly useful on vertical surfaces because their thicker consistency helps reduce running. However, the appropriate product depends on the door material and existing finish.
If you’re happy with the existing wood color, you can skip this step and proceed to applying a compatible protective finish.
Step 5: Apply a Protective Clear Finish
A protective topcoat helps preserve the appearance of the wood and protects against everyday wear.
For interior wooden doors, a compatible interior polyurethane or other clear wood finish may be suitable.
Exterior doors require more specialized protection. Look for a product specifically designed to withstand moisture, sunlight, and temperature fluctuations, ideally with UV protection.
Apply thin, even coats using a quality brush, working from the top of the door downward.
Avoid loading the brush with too much product, as this can cause drips and visible streaks on a vertical surface.
Allow each coat to dry according to the product instructions. Some finishes require light sanding between coats to improve adhesion and smoothness.
The required number of coats depends on the coating system and the manufacturer’s specifications.
Step 6: Allow the Door to Dry Before Regular Use
Patience is essential after applying the final finish.
Although a wooden door may feel dry to the touch relatively quickly, the protective coating can take considerably longer to cure.
Keep the door open or slightly ajar where practical and secure, particularly while the coating is vulnerable to sticking to weatherstripping or the frame.
For exterior doors, plan the project around suitable weather conditions. Avoid rain, excessive humidity, and temperatures outside the coating manufacturer’s recommended application range.
Do not reinstall hardware or resume normal use until the finish has reached the appropriate handling stage.
How Long Does It Take to Refinish a Wooden Door?
The amount of time required depends on the door’s condition and the type of finish being applied.
For a lightly worn door that only needs cleaning, surface preparation, and a fresh clear coating, the project may take approximately one to two days.
A door requiring sanding and multiple protective coats may take one to three days.
For complete restoration involving stripping, staining, and sealing, homeowners should plan for two to four days or longer.
These are general planning estimates. Product recoat intervals, weather conditions, and curing requirements can significantly affect the schedule.
Should You Refinish or Replace Your Wooden Door?
Not every aging wooden door needs to be replaced.
Refinishing may be the better option when the door remains structurally sound, operates properly, and has primarily cosmetic damage.
However, replacement may be worth considering if the door has extensive rot, persistent swelling, severe warping, or significant structural deterioration.
A new door may also make sense during a larger home renovation, particularly if you’re changing the entryway design, improving insulation, or updating the architectural style of the property.
For homeowners considering a larger remodeling project, the decision should account for both aesthetics and long-term performance.
Tips for Maintaining Wooden Doors in Bellevue’s Climate
Wooden exterior doors in Bellevue and the greater Seattle area experience a combination of seasonal rainfall, moisture, temperature changes, and summer sunlight.
These conditions make preventive maintenance especially important.
Inspect the door regularly for early signs of coating failure, including fading, hairline cracks, peeling, or exposed wood.
Keep weatherstripping in good condition, address water intrusion promptly, and ensure that the protective finish remains intact.
Regular maintenance can help delay the need for more extensive refinishing.
An entryway with adequate overhead protection may also experience less direct exposure than one without a covered porch.
Frequently Asked Questions About Wooden Door Refinishing
Can I refinish a wooden door without sanding it?
Sometimes. If the existing finish is sound, certain compatible renewal products may allow cleaning and limited surface preparation rather than extensive sanding. However, peeling coatings, exposed wood, and major discoloration generally require more thorough preparation.
Can I apply new stain over an old door finish?
Traditional penetrating wood stains generally require access to bare, absorbent wood. Some gel stains or specialty coatings can be applied over properly prepared existing finishes, but compatibility and adhesion should be tested first.
Can I use polyurethane on an exterior wooden door?
Yes, provided the specific polyurethane product is rated for exterior use. Interior polyurethane is not a suitable substitute for coatings formulated to withstand sunlight and weather exposure.
Is it better to brush or spray a wooden door?
Both methods can produce good results. Brushing is often more manageable when a door remains attached to its hinges, especially for smaller residential projects. Spraying requires more extensive masking, ventilation, and control of overspray.
How often should an exterior wooden door be refinished?
There is no universal schedule. The lifespan of the finish depends on sunlight exposure, weather conditions, door orientation, and coating quality. Inspect the finish at least annually and maintain it before the protective coating begins to fail.
Can you refinish a front door without removing the hardware?
Yes, although removing handles and other accessible hardware typically produces a cleaner result. If hardware cannot be removed, carefully protect it with painter’s tape before sanding, staining, or sealing.
Refresh Your Home With F&M Construction & Remodeling
Refinishing a wooden door can improve its appearance without the cost or disruption of a complete replacement. With careful preparation, compatible products, and proper maintenance, homeowners can preserve the natural character of their woodwork.
For those planning more extensive home improvements, updating interior doors, millwork, trim, and entryway finishes can complement a broader remodeling design.
F&M Construction & Remodeling works with homeowners throughout Bellevue and the surrounding Eastside on residential remodeling and home improvement projects.
Whether you’re updating an existing interior or planning a complete home transformation, thoughtful material selection and quality craftsmanship can help create a cohesive, lasting result.
Explore our remodeling services or schedule a consultation at www.fmremodeling.com.